Developer — API keys & REST API
Issue and manage API keys, configure scopes, and use the Certivant REST API to create verification requests and sync KYC status programmatically from your own systems.
What it does
The Certivant REST API lets your own systems create verification requests, upload documents, and fetch status — without going through the dashboard. Two main use-cases:
- Embed verification in your own onboarding flow. Your sign-up form posts to your backend, your backend calls Certivant, the applicant gets a Certivant hosted-flow link.
- Sync verification status into your data warehouse / CRM. Combine with webhooks so your systems update on status changes.
API auth is via API keys you issue from the dashboard. The full endpoint documentation lives at /app/{your-org}/kyc/developer — this page covers key management and the conceptual overview.
Where it lives
KYC → Developer in the left sidebar. (API keys used to live under KYC/B settings — they now have their own Developer home.)
The Developer Portal is a single hub with a left-hand menu:
- Overview & quickstart — your base URL, authentication, and a copy-paste request in 8 languages (cURL, JavaScript, TypeScript, Python, PHP, Go, Java, C#). Snippets are pre-filled with your real host and a placeholder for your key.
- API keys — list, create, and revoke your keys.
- Endpoint reference — every integration (
/v1) endpoint with its method, path, scopes, and parameters, plus a link to the interactive API Playground. - Webhook handlers — ready-made signature-verifying handlers in 6 languages (see also Webhooks).
- Rate limit — your organization's effective per-minute limit, shown read-only.
- FAQ — the questions integrators ask most.
Issue an API key
Click New Key
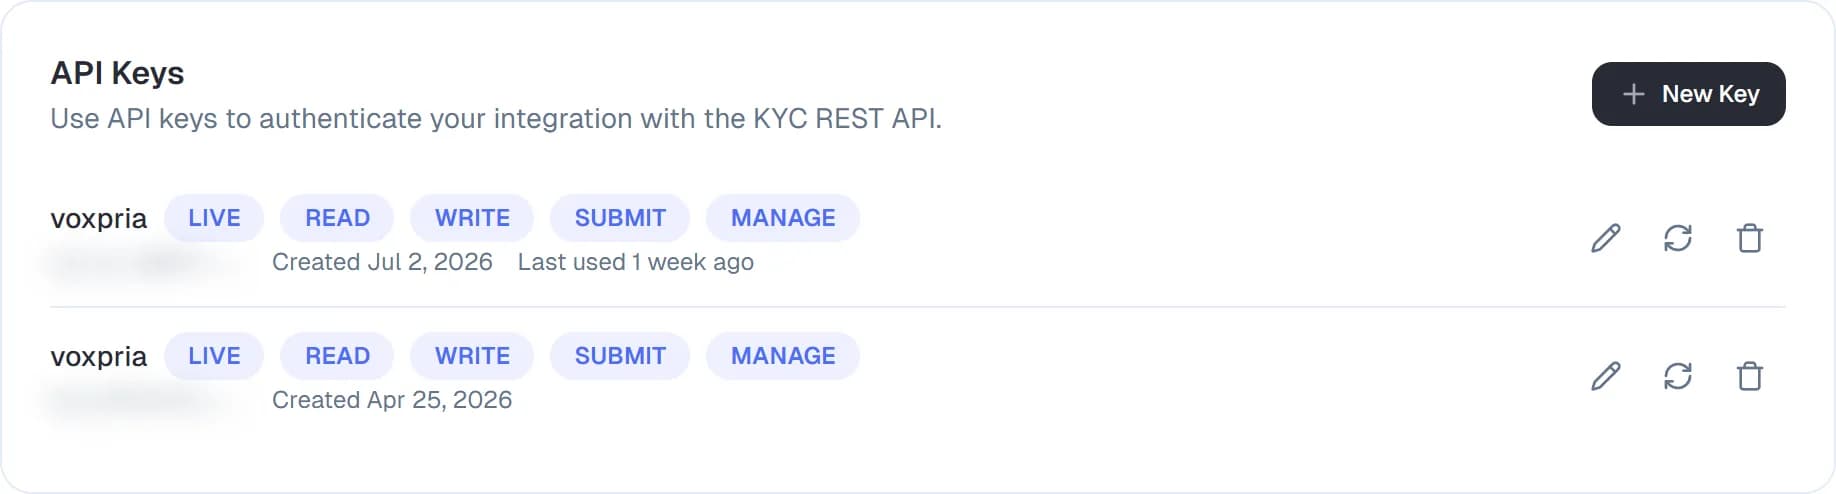
The API Keys card at the top of the Developer page lists your keys with their environment, permissions, creation date and last use. Each row has buttons to edit, rotate and revoke the key.
A dialog opens.
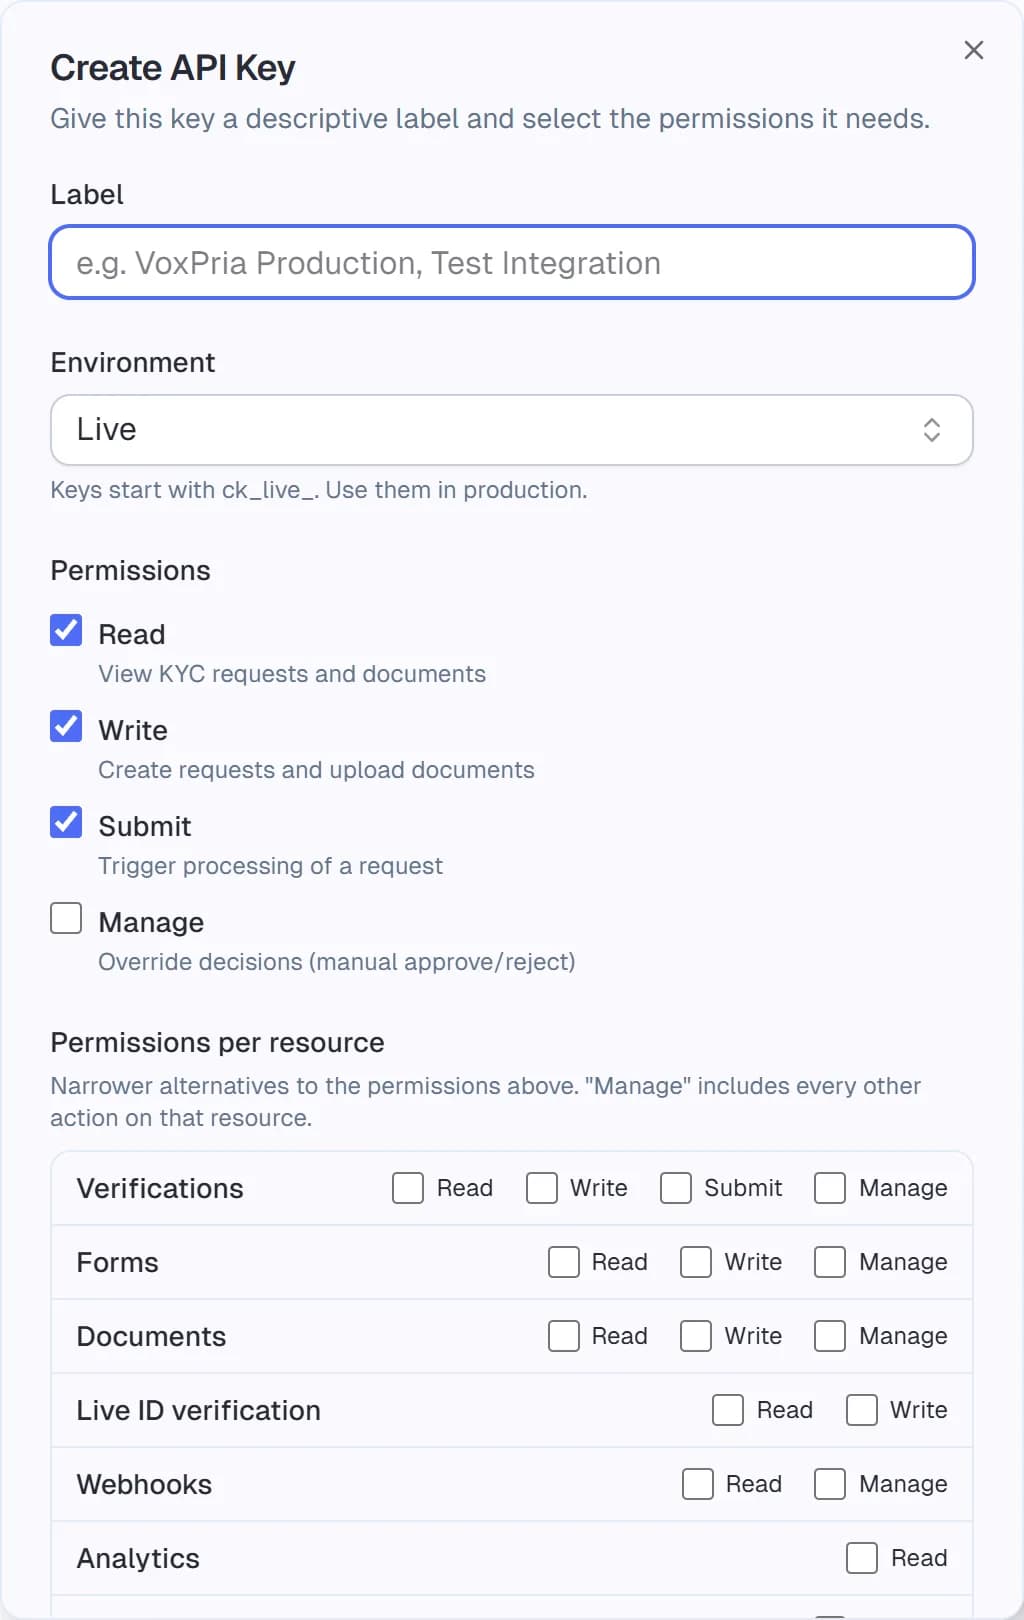
Name it
Pick a label that says where the key is used: "Production backend (Heroku)", "CI pipeline", "Local dev — alice's laptop". The name appears in audit logs alongside every API action.
Pick scopes
Permissions are scoped per-key. There are two ways to grant them, and you can mix them:
| Scope | What it allows |
|---|---|
kyc:read | Read anything: requests, documents, forms, analytics. |
kyc:write | Create and change things: requests, document uploads, form sends, live verifications. |
kyc:submit | Release a request to automated processing. |
kyc:manage | Privileged actions: override decisions, delete documents, erase or export an applicant's data. |
Or pick narrower, per-resource permissions (Read, Write, Submit, Manage for each resource):
| Resource | Scopes | Covers |
|---|---|---|
| Verifications | verifications:read · write · submit · manage | Verification requests, KYB, EDD, fraud signals |
| Forms | forms:read · write · manage | Form list, sending a form, delivery tracking |
| Documents | documents:read · write · manage | Request documents |
| Live ID verification | live_id:read · write | Scheduling and tracking live verification calls |
| Webhooks | webhooks:read · manage | Webhook endpoints (must be granted explicitly) |
| Analytics | analytics:read | Analytics and the triage summary |
| Privacy & erasure | privacy:manage | Deletion requests, erasure, per-applicant export |
Manage on a resource includes every other action on that resource. A per-resource scope never reaches beyond its resource: a key with only forms:read cannot read verification requests.
Pick the minimum scopes the key actually needs. A key for "send a form from our signup flow" only needs forms:write.
(Optional) Restrict the key
- Forms — limit the key to specific forms. It can then only list, send and create verifications through those forms, and it only ever sees the verifications that were created through them (list, detail, documents, summary, analytics). Anything else is refused with
403 form_not_allowed. A form-restricted key cannot create a verification without naming one of its forms (formId), and cannot use the applicant-erasure, deletion-request, reuse and live-verification endpoints. Verifications that already existed before this was enforced become visible to a form-restricted key once Certivant runs its one-time back-fill. - Workflows — limit the key to specific automation workflows. For every verification the key creates, only those workflows may run (whoever triggers them later — the applicant, a decision, a reviewer); other workflows are skipped for that verification. Verifications created from the dashboard, by applicants on a public form or by other keys are not affected. No API call fails because of this restriction.
Leave everything unchecked for no restriction.
- IP addresses — list the IPv4/IPv6 addresses or CIDR ranges the key may be used from (one per line, e.g.
203.0.113.7,198.51.100.0/24,2001:db8::/32). Requests from any other address are refused with403 ip_not_allowed.
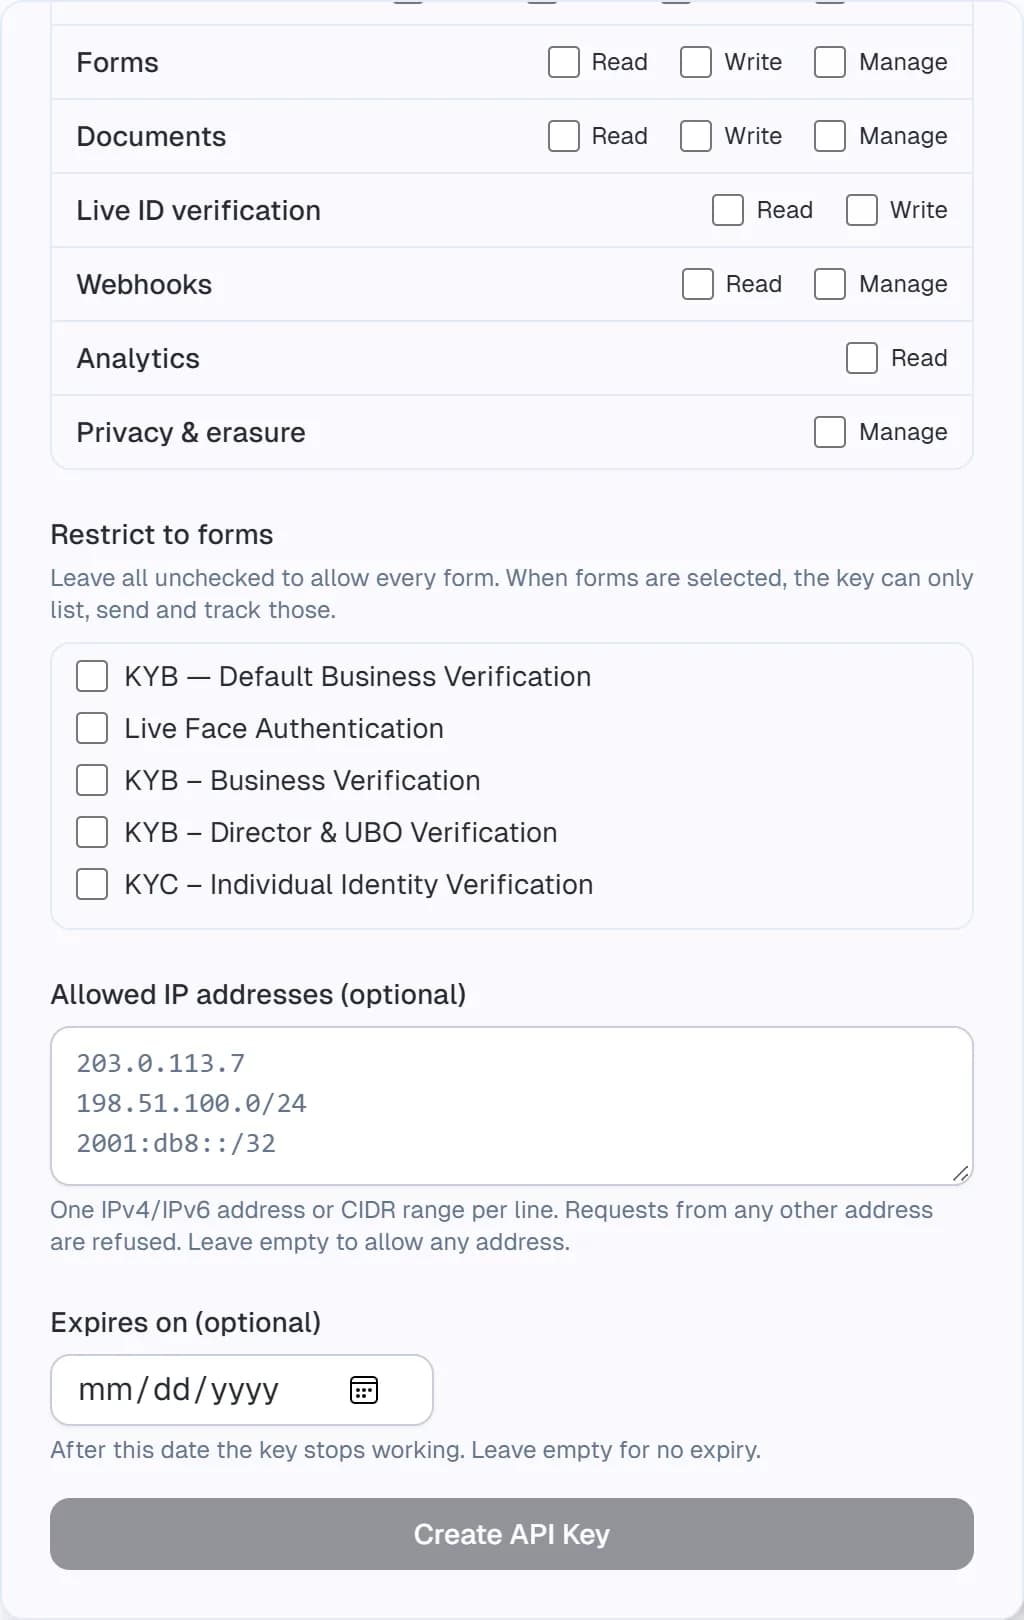
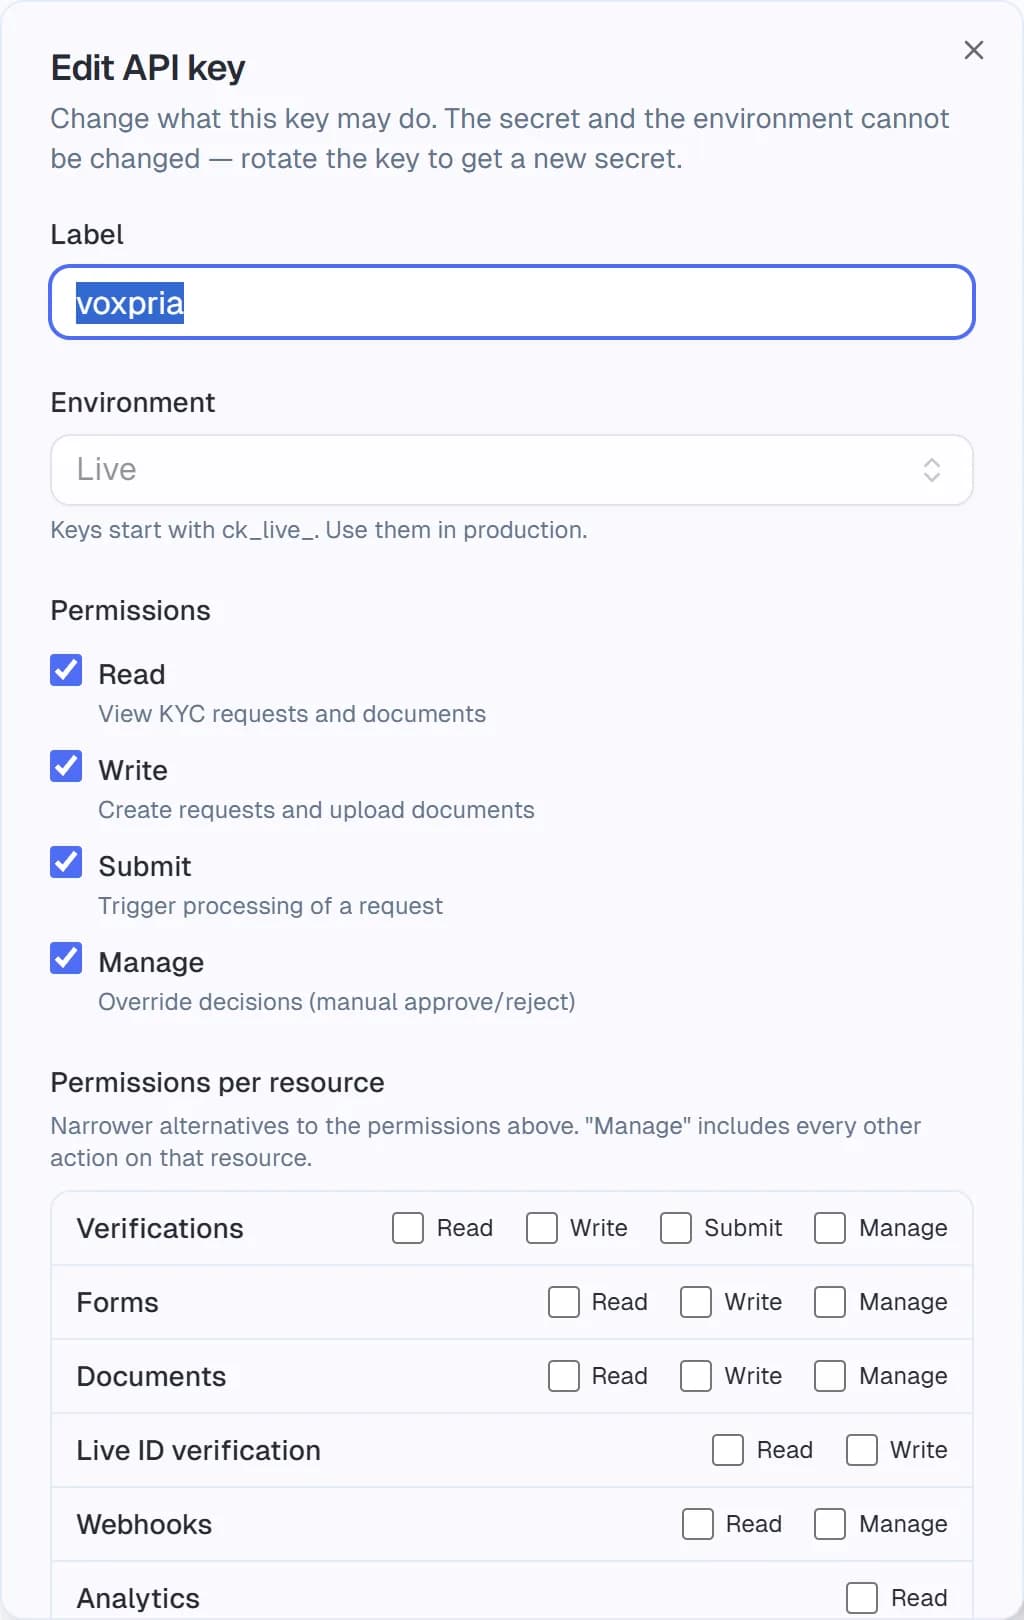
You can change scopes, restrictions and the expiry later with Edit (the pencil icon) — the secret and the environment cannot be changed.
(Optional) Expiry
Set a date the key auto-expires. Recommended for short-lived integrations (CI tokens, demos). Production keys often have no expiry; rotate them on a schedule instead. An expired key returns 401 api_key_expired.
Choose the environment
Live keys start with ck_live_, Test keys with ck_test_ (see Live vs. test below).
Create
The key is shown once in a modal. Copy it now — it's not retrievable later. The dashboard displays only the prefix (e.g. ck_live_a3f1) so you can identify keys without exposing them.
Use the key
Send it in the Authorization header:
Authorization: Bearer ck_live_a3f...
Keys created before the ck_live_ / ck_test_ format (starting with kyk_) keep working unchanged.
The fastest path to a working integration:
Create a request
curl https://api.certivant.com/api/v1/kyc/requests \
  -H "Authorization: Bearer $CV_API_KEY" \
  -H "Content-Type: application/json" \
  -d '{
    "type": "INDIVIDUAL",
    "applicant": {
      "fullName": "Jane Doe",
      "email": "jane@example.com"
    }
  }'
Returns the new request id + a one-time URL where the applicant uploads documents.
Send the applicant to the URL
You can email it yourself, embed it in your own onboarding flow, or have us email it via the dashboard "Send invitation" flow instead.
Receive the outcome via webhook OR poll
- Webhook (recommended): register an endpoint that handles
kyc.request.approved/rejected/escalated. See Webhooks. - Polling:
GET /api/v1/kyc/requests/{id}returns the current status. Recommended interval ≥ 30s.
Partner / sub-tenant attribution
If you run verifications on behalf of many end customers from one organization — the classic partner / reseller pattern, e.g. an e-sign platform verifying signers for hundreds of businesses — you don't need an organization per customer. Tag each request with two optional fields when you create it via the API:
subTenantName— the end customer's display name (e.g. "Acme Corp").subTenantExternalId— your own internal id for that customer (e.g.cust_8842).
Once tagged, you can:
- Filter the list endpoint by
subTenantExternalId(GET /api/v1/kyc/requests?subTenantExternalId=cust_8842). - Route webhooks — both fields are echoed on every event envelope, so your handler knows which customer a result belongs to without a lookup.
- Filter the dashboards — KYC/B Usage, Audit log, Monitoring, Reports, and Analytics all gain a Sub-tenant filter once any request carries the tags, and the KYC/KYB lists can show Sub-tenant + External ID columns (hidden by default — enable them from the column menu).
See the API reference for the exact request shape: KYC requests → Create a request.
Rate limits
Your per-minute API rate limit is set by your plan (typical defaults: 60/min on Launch, 300/min on Pro/Scale, 600/min on Enterprise). The exact ceiling for your organization is shown read-only on the Developer page, and every API response carries it in the X-RateLimit-Limit header. Each key is metered independently against that ceiling.
When you exceed it, requests return HTTP 429 Too Many Requests with X-RateLimit-Reset (seconds until the window resets). Back off and retry.
Need a higher ceiling? Your super admin sets it — they can raise your per-customer limit up to your plan's cap from Admin → Customers → (your org) → Edit organization (a bigger cap means moving to a higher plan). The limit is operator-controlled: tenants can view it but not change it. See the developer reference for the full mechanics: Rate limits.
Security best practices
- Store keys in env vars or a secret manager. Never commit them to git, never share them in chat. Keys committed to public repos are routinely scraped within minutes.
- One key per environment. Don't share a
ck_live_...key between staging and production — rotation of one shouldn't affect the other. - Use scoped keys. A read-only key for monitoring + a write key for the onboarding service is safer than one omnipotent key everywhere.
- Lock keys to your servers. Add the IP allowlist for keys used only from fixed addresses.
- Rotate quarterly. Use Rotate (below): the old key keeps working for the overlap you choose, so you can deploy the new one with no downtime. The audit log records the cutover.
- Watch for unauthorised use. The key list shows when and from which address each key was last used, and the audit log records key creation, edits, rotation and revocation. Investigate any address you don't recognise.
Rotate a key
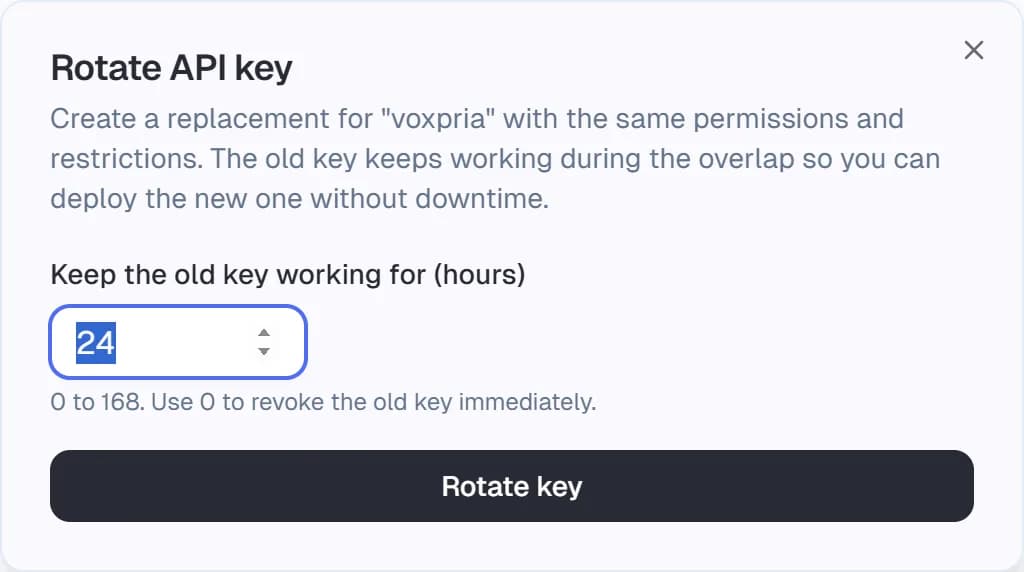
Developer → API keys → Rotate creates a replacement with the same label, permissions, restrictions, IP allowlist and expiry, and shows the new key once.
- Overlap (0–168 hours, default 24). The old key keeps working for this long, then returns
401 api_key_rotated. Set0to revoke the old key immediately. - The list marks the old key "Rotated — old key works until …" and the new one "Replaces a rotated key". A key that has already been rotated cannot be rotated again; rotate its replacement.
- You can also edit or revoke the old key during the overlap if you need to cut it off sooner.
Revoke a key
When a key is compromised, leaked, or no longer needed:
- Developer → API keys → kebab menu → Revoke.
- Active immediately. Any in-flight request using the key 401s on the next call.
- Cannot be undone — there's no "un-revoke" button. Issue a new key if you regret it.
The revoke is recorded in the audit log along with which user did the revoke.
Live vs. test
Every key is either:
- Test (
ck_test_...) — meant for development and CI. - Live (
ck_live_...) — meant for production.
The environment tags usage: every response carries X-Certivant-Environment: test or live, and the dashboard shows the badge next to the key, so you can tell test traffic from production traffic in your logs.
Test keys do not isolate data. They read and write the same verifications as your live keys. The only sandbox is the one every new organization starts in: until Certivant has verified your organization, live verification features are blocked for all of its keys. Use a separate organization if you need fully separate test data.
Troubleshooting
401 Unauthorized
The response body's error.reason tells you why:
error.reason | Meaning |
|---|---|
missing_api_key | No Authorization: Bearer … header. |
invalid_api_key | The key doesn't exist (typo, truncated, wrong organization). |
api_key_revoked | The key was revoked. |
api_key_expired | The key's expiry date has passed. |
api_key_rotated | The key was rotated and its overlap window ended. Use the replacement. |
403 Forbidden
error.reason:
error.reason | Meaning |
|---|---|
insufficient_scope | The key doesn't have the scope for the endpoint (the message names the accepted scopes). Edit the key or issue a new one. |
ip_not_allowed | The request came from an address that isn't on the key's IP allowlist. |
form_not_allowed | The key is restricted to other forms: the form, or the verification you asked for, was not created through one of them. |
429 Too Many Requests
You're being rate-limited. Look at the Retry-After header (seconds) and back off accordingly. For sustained volume, ask for a higher limit.
"I lost the key value"
Keys are shown once. There's no recovery. Revoke the old key and issue a new one — your team will have to update the new value wherever the old one was deployed.
Related
- Webhooks — pair with the API for full integration.
- KYC list & detail — dashboard-side view of API-created requests.
- Audit log — every API call shows up here.
Webhooks
Receive real-time Certivant events in your own systems when verifications change status — setup, HMAC signature verification, retry schedule, and full event-type reference.
Document Types, Expiry & Recency Settings
Choose which identity and business documents Certivant accepts, set how old a document may be, and decide what happens when a document is expired, too old, or its date can't be read — for both KYC and KYB.