Forms builder
Use the Certivant drag-and-drop form builder to design KYC and KYB intake forms with custom fields, document requirements, and conditional logic.
What it does
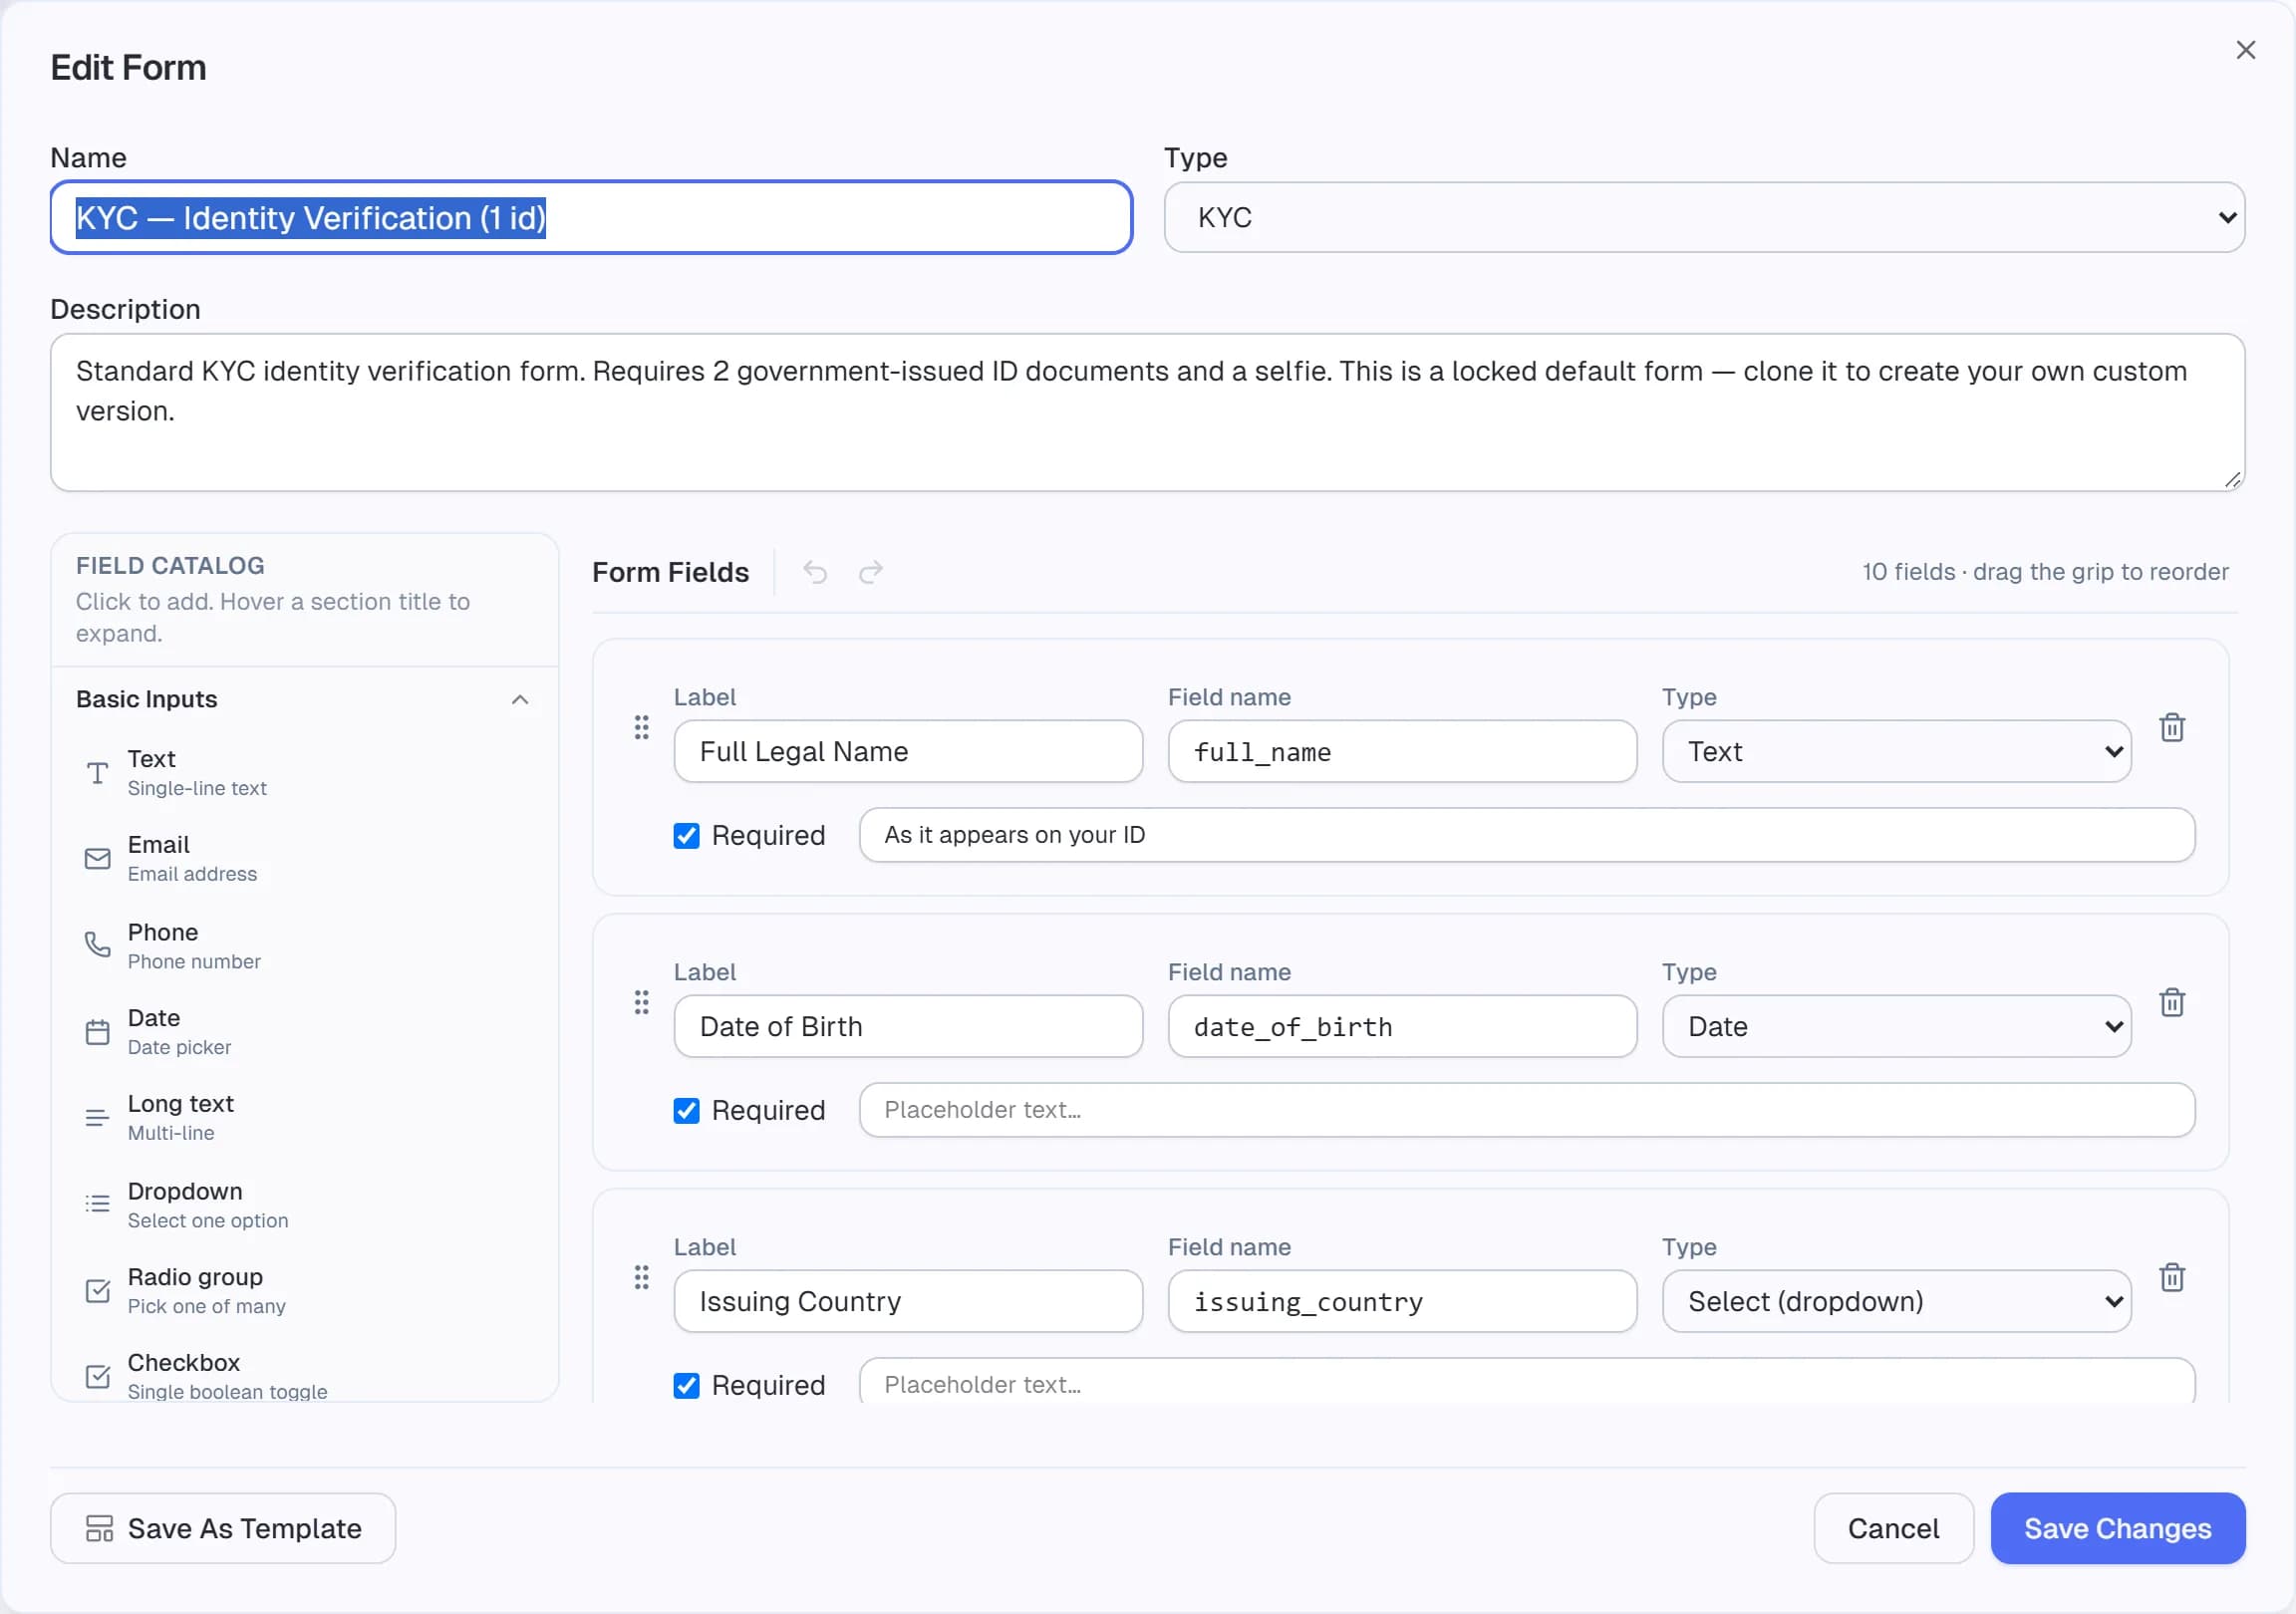
The form builder is a drag-and-drop canvas where you define exactly what the applicant sees. You add fields (text, date, select, checkbox, …), specify which documents they must upload, and optionally add conditional logic ("show this only if country = US").
The builder is split into three panes:
- Left — the field palette. Drag any field type onto the canvas.
- Centre — the canvas. Live preview of the form as the applicant will see it. Click any field to select it.
- Right — the properties panel. Edit the selected field's settings.
Before you start
- Decide the form's type (KYC / KYB / custom) before adding fields — switching type later breaks fields that don't apply to the new type.
- Have your document list ready. Knowing in advance whether you need passport, driver's license, utility bill, etc. cuts builder time in half.
Field types
| Type | Use when |
|---|---|
text | Single-line free text. Name, address line, occupation. |
textarea | Multi-line free text. Comments, source-of-funds explanation. |
email | Email address; validates format. |
phone | Phone number; validates format per country. |
date | Date picker. Use for date of birth, document expiry. |
number | Numeric input; supports min/max. |
| Type | Use when |
|---|---|
select | Single-choice dropdown. Country, language, preferred contact. |
radio | Single-choice radio buttons. Gender, tax residency yes/no. |
checkbox | Multi-choice. "Which products are you interested in?" — applicant picks any combination. |
Define the options in the properties panel — one per line, with optional value:label syntax (e.g., US:United States).
The document selector is a special field. It tells the applicant "upload one of these document types" and lets them pick which one (passport vs. driver's license vs. national ID).
Each option in the selector has:
- An id (e.g.,
passport,drivers_license,national_id). - A label shown to the applicant.
- A requires both sides flag — when on, the applicant must upload front AND back.
Common selector setups:
- Government ID — passport (single-sided), driver's license (both sides), national ID (both sides).
- Proof of address — utility bill, bank statement, lease agreement.
- Selfie — always single, no selector needed (the system collects it automatically).
These fields auto-populate the applicant record (name, DOB, etc.) and feed into checks:
- Full name — required for sanctions screening and the audit log.
- Date of birth — drives age-of-majority checks.
- Nationality — drives the country-allowlist enforcement.
- Residence country — required for AML risk scoring.
- Legal entity name — drives business sanctions screening.
- Registration number — used for registry lookups (if the registry-lookup provider is configured).
- Country of incorporation — drives the entity-type defaults.
- Beneficial owners — collapsible section. Each beneficial owner spawns a mini-KYC sub-form for them.
Field properties
Every field has these in the properties panel:
| Property | Notes |
|---|---|
| Name | The internal key used in submissions JSON. Snake-case (e.g., tax_id). |
| Label | What the applicant sees above the field. |
| Help text | Smaller text shown below the field. Use for examples ("e.g., 123-45-6789"). |
| Required | Applicant can't submit without filling this field. |
| Placeholder | Greyed-out hint inside the input. |
| Default value | Pre-fills the input. Useful when an external system pre-pre-populates fields via URL params. |
Conditional logic
Select a field, open Show only if in the properties panel. You can chain conditions:
- "Show Tax ID only if Tax resident in US =
yes." - "Show Beneficial owners (additional) only if Number of beneficial owners > 1."
Conditional fields are completely hidden from the applicant until their predicate becomes true. They don't count as required when hidden.
Steps
Open the builder
Forms → New form (or click an existing form's name).
Set form metadata
Click the form title at the top to edit. Fill:
- Name — internal label, e.g. "Standard KYC (Individual)".
- Description — shown to your team in the Forms list.
- Type — KYC, KYB, or Custom.
- Visibility — Org / Team / Specific users.
Drag fields onto the canvas
From the left palette. Reorder by dragging. The first field is what the applicant sees first — front-load the easy ones (name, email) and put document uploads near the end so the applicant has momentum by the time they reach them.
Configure each field
Click a field, fill its properties on the right.
Use snake_case field names — when you export submissions or pipe them to a webhook, the names become JSON keys. Mixed-case names cause subtle integration bugs downstream.
Add conditional logic (optional)
If your form branches based on answers, add the conditions in the properties panel. Test by clicking Preview and walking through both branches.
Save as draft
The Save button keeps the form in draft status. Drafts don't appear in the Send-request picker — only published forms do. See Forms preview & publish for what to do next.
Document requirements
Beyond the document-selector field, every form has a required documents list under Form settings → Documents. The form's verification is only complete when the applicant has uploaded each required document. Common combinations:
- Standard KYC — Government ID (selector), Selfie (automatic), Proof of address.
- High-risk KYC — adds: bank statement, source-of-funds declaration.
- Standard KYB — Certificate of incorporation, registered-address proof, list of beneficial owners with KYC for each.
Capture security options
Each form has a Capture security card in the form editor (the template editor has it too). It sets how applicants photograph their ID and selfie:
- Camera only for IDs and selfies — personal IDs and the selfie must be taken live with the device camera. File uploads are refused.
- Ask for device location — records the approximate location (about 100 m) where the photo was taken. If the applicant does not share it, you choose: allow, flag for review, or block.
- Let applicants skip the face check — off by default. While it is off, the selfie and the face check are required: the applicant must tick the Face check box in the consent panel to continue. Turn it on only where the law requires a non-biometric alternative, for example in Québec. Applicants who decline then skip the selfie and the face and liveness checks, and the request goes to manual review with a live ID verification recommended. The switch applies to the form and to the requests created from it. It overrides the organization setting, but not
faceCheckSkippablesent in the API. See Fraud signals.
Troubleshooting
A field doesn't show up in the preview
It's probably hidden by a conditional. Click Preview and fill the predicate fields to see it appear.
"Save" is greyed out
The form has validation errors — usually a field with a duplicate name, or a missing required label. The properties panel will highlight the issue with a red border.
The applicant sees fields I removed
You probably edited a published form and forgot to re-publish. Edits to a published form don't go live until you click Publish again. See Forms preview & publish.