White-label basics
Customise the hosted verification flow with your own brand — upload a logo, set your primary colour, and replace Certivant branding with your organisation name.
What it does
Replaces the Certivant branding on every customer-facing surface (the hosted verification page the applicant fills out, the email they receive, the resubmission link they click) with your branding. The applicant's experience looks like it's coming from your business, not from us.
Two layers:
- Org-level branding — your organization name, logo, and primary colour. Available on all plans.
- Custom domain — your applicants land on
verify.your-domain.cominstead ofapp.certivant.com. Available on Pro and above; requires DNS configuration.
This page covers org-level branding (name, logo, colour), available on every plan. Custom-domain setup (Pro and above) requires DNS configuration — see the fully white-label domain note near the end of this page.
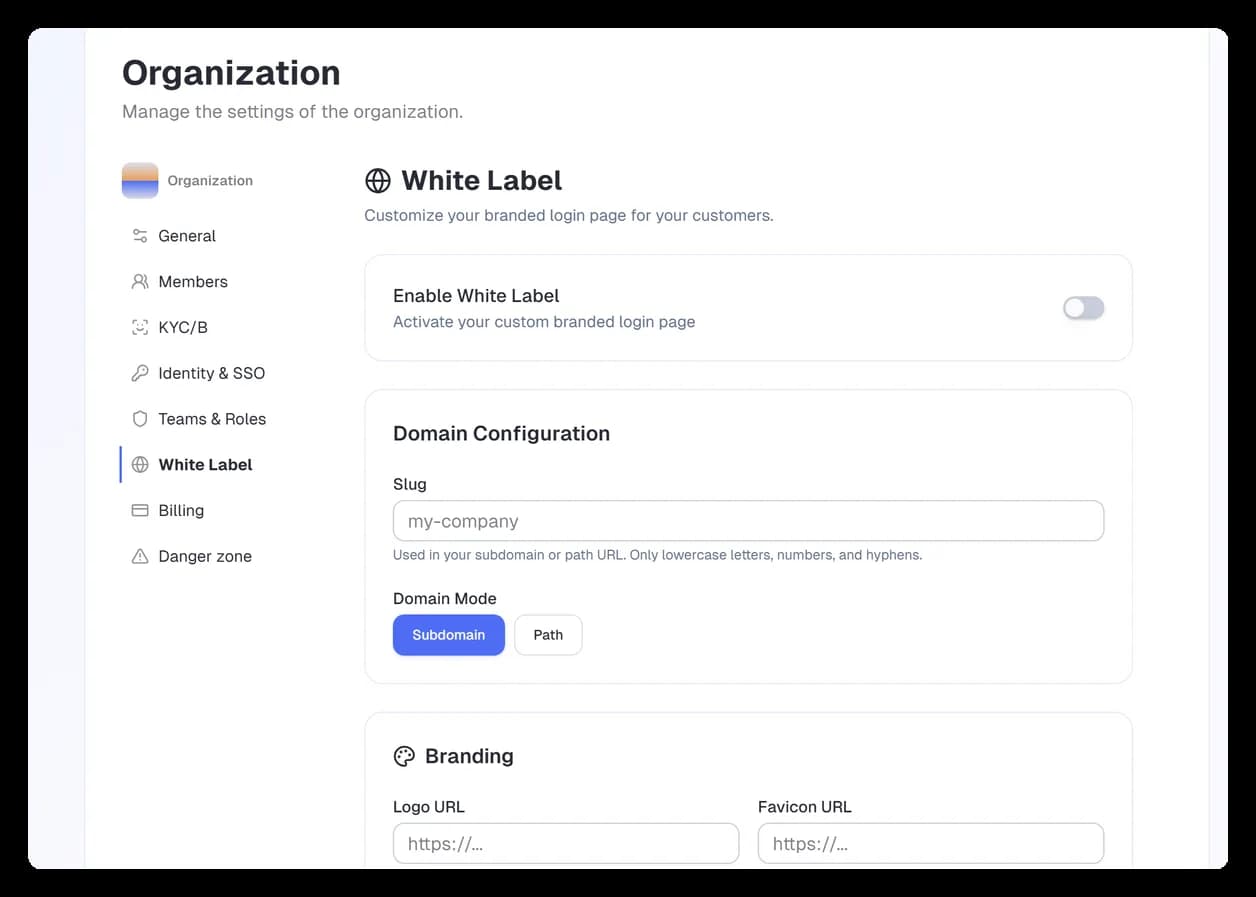
Moved here. The Hosted Verification Branding controls (logo, primary colour, and brand name for the applicant-facing flow) now live on this page. They used to sit under Settings → KYC/B — if you're looking for them there, they've been consolidated into White-label so all of your customer-facing branding is in one place.
Before you start
- An admin/owner account.
- A square logo file (PNG, JPG, or SVG). Recommend at least 512 × 512 px, transparent background.
- Optional: a primary hex colour for buttons and accents (e.g., your brand's hex code
#0F62FE).
Steps
Open White-label settings
Settings → White-label in the left sidebar. If you don't see the menu item, white-label may not be enabled on your plan — check Settings → Billing.
Upload your logo
Click Upload logo, pick the file. It appears in the preview to the right. The logo is shown:
- At the top of the hosted verification page.
- In the header of emails we send to applicants on your behalf.
- On PDF receipts and invoices generated for your customers.
Set your primary colour
Either enter a hex code in the colour input, or click the swatch to use a picker. The colour is applied to buttons and accents on the hosted flow. A live preview shows what the applicant will see.
Pick a colour with enough contrast against white text — the picker warns you if accessibility is borderline.
Set the display name (if different from your legal name)
By default, the public flow shows your organization's legal name. If you have a public-facing brand that's different (e.g., legal name "ACME Holdings LLC" but trade name "ACME Verify"), set the brand name here. This becomes the From name on outgoing emails and the heading on the verification page.
Save
Click Save changes. The new branding takes effect on the next verification you send. Already-sent invitations keep their old branding.
What customers see
flowchart TD
    Email["Email: 'Verify your identity'<br/>From: Your Brand Name<br/>Logo: your logo<br/>Button colour: your hex"] --> Click[Applicant clicks link]
    Click --> Page["Hosted page<br/>Header: your logo + brand name<br/>Buttons: your colour<br/>Footer: 'Secured by Certivant'"]
    Page --> Upload[Upload documents]
    Upload --> Done["Confirmation page<br/>still branded yours"]
A small "Secured by Certivant" footer remains on the hosted page itself, by default. This is removable on Pro plans — set under Settings → White-label → Advanced.
Options & fields
| Field | Notes |
|---|---|
| Logo | PNG/JPG/SVG, square recommended. Max 5 MB. |
| Primary colour | Hex code or visual picker. Applied to buttons, links, progress bars. |
| Brand name | Optional. Shown in emails and page headers. Defaults to org name. |
| Reply-to email | Where applicant replies route. Defaults to the org owner's email. |
| Support email | Shown on the hosted page in the help text. Optional. |
| Hide "Secured by Certivant" | Pro and above. Removes the footer. |
Multi-tenant: white-label per child organization
If you run a multi-org account (e.g., a holding company with several brands, each on its own organization), each organization has its own white-label settings. Switch organizations from the top-left sidebar and configure each independently.
Troubleshooting
The logo looks blurry on the hosted page
Upload a higher-resolution source file. The hosted page renders the logo at up to 256 × 256 device pixels (so 512 × 512 minimum for retina screens). SVG is ideal — it scales infinitely.
My colour doesn't show
Hex must include the # and be 6 characters (e.g., #0F62FE, not 0F62FE or #FE). Save and refresh the preview.
Emails still say "From: Certivant"
Two reasons this can happen:
- You set a Brand name but not a Reply-to email that matches your domain. Email providers require the domain to be verified for the From header to use your brand. Ask your super admin to verify your domain under Admin → Settings → Email → Sender domains.
- You're looking at an email sent before you saved your white-label settings. Newly-sent emails use the latest branding.
I want a fully white-label domain (verify.mybrand.com instead of app.certivant.com)
That's the custom-domain feature — available on Pro and above. Setup is a two-step handshake with your super admin:
- Ask your super admin to add your domain (e.g.
verify.mybrand.com) under Admin → Customer management → your org → White-label, and to give you the CNAME target it generates. - Create the CNAME record at your DNS provider pointing your subdomain at that target, then tell your super admin to verify it. Once DNS resolves, applicants load your form at your own domain.
DNS changes can take up to a few hours to propagate; the domain shows as pending until verification succeeds.
Related
- Billing & credits — some white-label features are plan-gated.
- Send a verification request — what the applicant goes through.
Teams & Roles
Organise your Certivant workspace into teams with data-isolation modes (strict, open, owner-only) and create custom roles with fine-grained permission bundles.
Danger zone
Permanently delete your Certivant organization — understand what data is removed, compliance considerations, recovery limits, and safer alternatives before proceeding.